Presentation Layer (Clean Architecture)
When building a Flutter app, it’s tempting to focus only on the UI. But as your app grows, so does its complexity. Without a good foundation, you’ll eventually find yourself buried in spaghetti code and struggling to add even simple features.
That’s why this blog series is all about building a scalable Flutter application using Clean Architecture.
📚 The App: Vocabulary Flashcard Trainer
Instead of yet another TODO app, we’ll build a Vocabulary Flashcard App that helps users improve their language skills by creating and reviewing flashcards.
💡 Key Features:
- Users can create cards with: A word, its meaning, an example sentence
- Cards are randomized each time the app is opened.
- Users can mark cards as learned.
- The app supports dark/light themes and localization.
- All data is stored locally using Isar DB.
🧩 What You’ll Learn
This is the first of a four-part series where we’ll walk through every layer of the architecture:
- App Initialization & Presentation Layer — Routing, localization, theming, state management, and DI setup.
- Domain Layer — Defining entities, repositories, and use cases with SOLID principles.
- Data Layer — Implementing Isar DB, data models, and CRUD operations.
- Feature Integration — Hooking everything up and polishing the final user experience.
By the end, you’ll not only understand how Clean Architecture works in Flutter — you’ll have a practical, ready-to-use vocabulary trainer app that you can build upon.
🏗️ 1. Folder Structure and Clean Architecture Overview
Before writing any widget or state logic, it’s essential to define a structure that will help your app grow in a clean, scalable way.
In this series, we’ll follow the Clean Architecture approach. It separates concerns into clear layers — each one with its own responsibilities and boundaries. This structure makes your codebase easier to test, maintain, and extend.
🧱 Clean Architecture: A Quick Overview
Clean Architecture is composed of three main layers:
- Presentation Layer — Handles UI and state (e.g., Cubits, Widgets).
- Domain Layer — The business logic: use cases, entities, and abstract repositories.
- Data Layer — Works with APIs, databases, and actual data sources. It contains repository implementations and data mappers.
The key idea is dependency direction: The outer layers (presentation, data) can depend on the inner layer (domain), but never the opposite.
📁 Project Folder Structure
We’ll organize our project into features and core. Each feature follows the clean architecture pattern internally.
Here’s a sample folder structure we’ll use for our Flashcard App:
lib/
├── core/                     # Shared utilities like theme, localization, router, and DI
│   ├── di/
│   ├── error/
│   ├── localization/
│   ├── router/
│   ├── theme/
│   ├── usecase/
│   ├── utils/
│   └── widgets/
│
├── features/                 # Feature-specific code
│   └── cards/
│       ├── data/
│       │   ├── datasources/
│       │   ├── mappers/
│       │   ├── models/
│       │   └── repositories/
│       ├── domain/
│       │   ├── datasources/
│       │   ├── entities/
│       │   ├── repositories/
│       │   └── usecases/
│       └── presentation/
│           ├── cubit/
│           ├── pages/
│           └── widgets/
│
├── app.dart                  # Entry widget with router/theme setup
💡 Why This Structure Works
- Scalability: You can add more features like “Categories” or “User Profiles” without disrupting the existing structure.
- Testability: Each layer is easily mockable and unit-testable.
- Maintainability: Changes are isolated to their respective layers.
🌍 2. Internationalization with flutter_localizations and intl
Modern apps need to speak your user’s language — literally. That’s where internationalization (i18n) comes in. In this section, we’ll set up localization using flutter’s built-in tools and the intl package, so your flashcard app can support multiple languages from day one.
Step 1: Add the Required Dependencies
To use flutter_localizations, add the package as a dependency to your pubspec.yaml file, as well as the intl package:
flutter pub add flutter_localizations --sdk=flutter
flutter pub add intl
Verify the result in your pubspec.yaml file:
dependencies:
  flutter_localizations:
    sdk: flutter

  # Use for localization
  intl: ^0.20.2

  ...

# The following section is specific to Flutter packages.
flutter:
  generate: true
Step 2: Create the l10n.yaml File
Create a file at the root of your project:
arb-dir: lib/core/localization
output-dir: lib/core/localization/generated
template-arb-file: intl_en.arb
output-localization-file: strings.dart
output-class: Strings
synthetic-package: false
Step 3: Add Your .arb Translation Files
Inside lib/core/localization, create your translation files:
// app_en.arb
{
  "@@locale": "en",
  "appTitle": "Flashcard App",
  "homeRoute": "Cards",
  "profileRoute": "Profile"
  ...
}
// app_es.arb
{
  "@@locale": "es",
  "appTitle": "Aplicación de Tarjetas",
  "homeRoute": "Tarjetas",
  "profileRoute": "Perfil"
  ...
}
Step 4: Supported languages
Create a class to export our supported languages
import 'package:flutter/material.dart';

class I18n {
  I18n._();
  static final all = [const Locale('es', 'EC'), const Locale('en', 'US')];
}
Step 5: Enable Localization in MaterialApp
Update your app.dart or wherever you declare MaterialApp:
import 'package:flutter/material.dart'; import 'package:flutter/services.dart'; import 'package:flutter_localizations/flutter_localizations.dart'; import 'package:flutter_flashcarte_app/core/localization/localization.dart'; class App extends StatelessWidget { const App({super.key}); Widget build(BuildContext context) { SystemChrome.setSystemUIOverlayStyle( const SystemUiOverlayStyle(statusBarColor: Colors.transparent), ); return MaterialApp( localizationsDelegates: const [ Strings.delegate, GlobalMaterialLocalizations.delegate, GlobalWidgetsLocalizations.delegate, GlobalCupertinoLocalizations.delegate, ], debugShowCheckedModeBanner: false, builder: (BuildContext context, Widget? child) {... locale: Locale("en"), supportedLocales: I18n.all, home: const MyHomePage(), ); } } class MyHomePage extends StatelessWidget { const MyHomePage({super.key}); Widget build(BuildContext context) { return Scaffold(appBar: AppBar(title: Text(Strings.of(context)!.appTitle))); } }
Step 6: Access Translations in the UI
Now it’s time to run the app (t doesn’t matter if there are errors in your title in Strings.delegate line) When the application runs, a directory is generated that contains access to messages in different languages. You can now use these messages in your application.
lib/
├── core/
│   ├── di/
│   ├── error/
│   └── localization/
│       ├── generated/
│       │   ├── strings_en.dart
│       │   ├── strings_es.dart
│       │   └── strings.dart
│       ├── i18n.dart
│       ├── intl_en.arb
│       ├── intl_es.arb
│       └── localization.dart
...
Now you can use AppLocalizations.of(context) to get localized strings:
Text(Strings.of(context)!.<message>)
You can learn more about internationalization in the official Flutter documentation.
🎨 3. Theming with Light/Dark Mode and Responsive Design
User experience is everything — and that means making your app look good on all devices and respecting the user’s visual preferences. In this section, we’ll set up:
- A custom light and dark theme
- Responsive design using
flutter_screenutilto ensure your app looks great on all screen sizes
Step 1: Define Your App Themes
Inside lib/core/theme/, create a styles.dart file with two custom themes:
import 'package:flutter/material.dart';

import 'package:flutter_flashcarte_app/core/theme/palette.dart';

/// Light theme
ThemeData themeLight(BuildContext context) => ThemeData(
  useMaterial3: true,
  primaryColor: Palette.primary,
  cardColor: Palette.background,
  scaffoldBackgroundColor: Palette.background,
  ...
);

/// Dark theme
ThemeData themeDark(BuildContext context) => ThemeData(
  useMaterial3: true,
  primaryColor: Palette.primary,
  cardColor: Palette.backgroundDark,
  scaffoldBackgroundColor: Palette.backgroundDark,
  ...
);
You can customize colors, typography, and widgets further as needed.
Step 2: Apply Themes in Your App
In app.dart apply the theme:
...
import 'package:flutter_flashcarte_app/core/theme/theme.dart';
...

return MaterialApp(
  localizationsDelegates: const [...
  debugShowCheckedModeBanner: false,
  builder: (BuildContext context, Widget? child) {...,
  title: 'Flashcard App',
  theme: themeLight(context),
  darkTheme: themeDark(context),
  locale: Locale("en"),
  supportedLocales: I18n.all,
  themeMode: ThemeMode.dark,
  home: const MyHomePage(),
);
📱 Responsive Design with flutter_screenutil
Your users might use a small phone or a large tablet. Let’s make your UI adapt to all screens smoothly.
flutter pub add flutter_screenutil
Step 3: Initialize ScreenUtil
Wrap your app’s entry point (in main.dart or app.dart) with ScreenUtilInit:
import 'package:flutter_screenutil/flutter_screenutil.dart';

...
return ScreenUtilInit(
 designSize: const Size(375, 667),
 minTextAdapt: true,
 splitScreenMode: true,
 child: MaterialApp(
  localizationsDelegates: const [...
  debugShowCheckedModeBanner: false,
  builder: (BuildContext context, Widget? child) {...,
  title: 'Flashcard App',
  theme: themeLight(context),
  darkTheme: themeDark(context),
  locale: Locale("en"),
  supportedLocales: I18n.all,
  themeMode: ThemeMode.dark,
  home: const MyHomePage(),
 ),
);
Make sure MaterialApp is inside the builder.
Step 4: Use Responsive Units in Your UI
Now you can use .w, .h, and .sp to make widgets adapt:
Container(
  width: 200.w,
  height: 100.h,
  padding: EdgeInsets.symmetric(horizontal: 16.w),
  child: Text(
    'Flash Card',
    style: TextStyle(fontSize: 18.sp),
  ),
);
ScreenUtil will scale everything based on the screen size and pixel density. With these foundations in place, your UI is now dynamic, visually adaptable, and scalable across devices.
🚦 4. Navigation Setup with GoRouter and Splash Page
A scalable app needs clean, maintainable navigation. Flutter’s Navigator works, but it can get messy as your app grows. We will use go_router, a declarative routing package that:
- Simplifies navigation logic
- pports deep linking out of the box
- Works seamlessly with state management
Step 1: Add the Required Dependencies
flutter pub add go_router
Verify the result in your pubspec.yaml file:
dependencies:
  ...
  # router
  go_router: ^15.2.4
Step 2: Define Routes
Create lib/core/router/app_router.dart:
...
import 'package:go_router/go_router.dart';

import 'package:flutter_flashcarte_app/features/profile/presentation/pages/pages.dart';
import 'package:flutter_flashcarte_app/features/cards/presentation/pages/pages.dart';
import 'package:flutter_flashcarte_app/core/router/home_page.dart';
import 'package:flutter_flashcarte_app/core/router/splash_page.dart';

final _rootNavigatorKey = GlobalKey<NavigatorState>(debugLabel: 'root');

enum Routes {
  root("/"),
  splashScreen("/splashscreen"),
  home("/home"),
  add("/add"),
  profile("/profile");
  const Routes(this.path);
  final String path;
}

final appRouter = GoRouter(
  navigatorKey: _rootNavigatorKey,
  routes: [
    GoRoute(
      path: Routes.splashScreen.path,
      name: Routes.splashScreen.name,
      builder: (_, __) => const SplashPage(),
    ),
    StatefulShellRoute.indexedStack(
      builder: (context, state, shell) => HomePage(navigationShell: shell),
      branches: [
        StatefulShellBranch(
          routes: [
            GoRoute(
              path: Routes.add.path,
              name: Routes.add.name,
              builder: (_, __) => const AddPage(),
            ),
          ],
        ),
        StatefulShellBranch(
          routes: [
            GoRoute(
              path: Routes.profile.path,
              name: Routes.profile.name,
              builder: (_, __) => const ProfilePage(),
            ),
          ],
        ),
      ],
    ),
  ],
  initialLocation: Routes.splashScreen.path,
  routerNeglect: true,
  debugLogDiagnostics: kDebugMode,
);
Note: In this instance, our pages are simple widgets, for example:
// features/cards/presentation/pages/add_page.dart class AddPage extends StatelessWidget { const AddPage({super.key}); Widget build(BuildContext context) { return Scaffold( body: Center( child: Text( Strings.of(context)!.homeTitle, style: Theme.of(context).textTheme.headlineMedium, ), ), ); } }
Step 3: Create a Splash Page
Inside core/router/splash_page.dart:
// core/router/splash_page.dart import 'package:flutter/material.dart'; ... class SplashPage extends StatefulWidget { const SplashPage({super.key}); State<SplashPage> createState() => _SplashPageState(); } class _SplashPageState extends State<SplashPage> { void initState() { super.initState(); Timer(const Duration(seconds: 2), () { context.go(Routes.add.path); }); } Widget build(BuildContext context) { return Scaffold( body: Center( child: Text( Strings.of(context)!.appTitle, style: Theme.of(context).textTheme.headlineMedium, ), ), ); } }
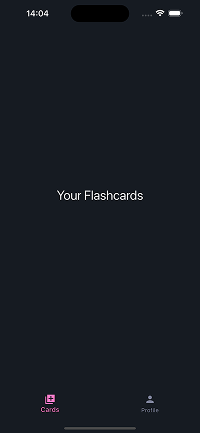
This splash page simulates a loading phase before navigating to your main HomePage.
Step 4: Use GoRouter in Your App
In app.dart change MaterialApp by MaterialApp.router and add our routerConfig
...
import 'package:flutter_flashcarte_app/core/router/app_router.dart';
...

return ScreenUtilInit(
  designSize: const Size(375, 667),
  minTextAdapt: true,
  splitScreenMode: true,
  child: MaterialApp.router(
    routerConfig: appRouter,
    localizationsDelegates: const [...
    debugShowCheckedModeBanner: false,
    builder: (BuildContext context, Widget? child) {...
    title: 'Flashcard App',
    theme: themeLight(context),
    darkTheme: themeDark(context),
    locale: Locale("en"),
    supportedLocales: I18n.all,
    themeMode: ThemeMode.dark,
  ),
);
This sets up clean, scalable navigation across your app. And our app looks like this:
|
🧠 5. State Management with Cubit: Simple, Predictable, Scalable
In any real-world Flutter app, you need a way to manage and react to changes in state: theme toggles, user preferences, flashcard updates, and so on.
For this, we’ll use Cubit, a lightweight state management solution that is part of the widely-used flutter_bloc package.
🧩 What is Cubit?
Cubit is a simplified version of Bloc (Business Logic Component) that:
- Exposes a state stream.
- Emits new states via method calls (no need for events).
- Keeps your business logic separate from your UI, which aligns perfectly with Clean Architecture.
In short, it’s a great fit for apps where state changes are predictable and simple, like ours.
🔁 Cubit in Action: Theme and Language Switching
Let’s create a cubit in our presentation layer in the profile feature. You could manage it as a global cubit, but since this will be controlled from the profile page, I prefer to create it here.
Step 1: Install flutter bloc dependency
flutter pub add flutter_bloc
Verify the result in your pubspec.yaml file:
dependencies:
  ...
  # Use for State Management with BLoC pattern
  flutter_bloc: ^9.1.1
Step 2: Create cubit
Now we are going to create a cubit called preferences. This cubit consists of two files, a state and the cubit itself. Let’s start with the state:
// features/profile/presentation/cubit/preferences_state.dart

part of 'preferences_cubit.dart';

enum ActiveTheme {
  light(ThemeMode.light),
  dark(ThemeMode.dark),
  system(ThemeMode.system);

  final ThemeMode mode;
  const ActiveTheme(this.mode);
}

class PreferencesState {
  final String? title;
  final String? lang;
  final ActiveTheme activeTheme;

  const PreferencesState({
    this.title,
    this.lang,
    this.activeTheme = ActiveTheme.system,
  });

  PreferencesState copyWith({
    String? title,
    String? lang,
    ActiveTheme? activeTheme,
  }) {
    return PreferencesState(
      title: title ?? this.title,
      lang: lang ?? this.lang,
      activeTheme: activeTheme ?? this.activeTheme,
    );
  }
}
And now the cubit to control that state:
import 'package:flutter/material.dart';
import 'package:flutter_bloc/flutter_bloc.dart';

part 'preferences_state.dart';

class PreferencesCubit extends Cubit<PreferencesState> {
  PreferencesCubit() : super(PreferencesState(lang: 'en'));

  void updateTheme(ActiveTheme activeTheme) {
    emit(state.copyWith(activeTheme: activeTheme));
  }

  void updateLanguage(String type) {
    emit(state.copyWith(lang: type));
  }

  ActiveTheme getActiveTheme() {
    final activeTheme = ActiveTheme.values.singleWhere(
      (element) => element.name == (ActiveTheme.system.name),
    );
    emit(state.copyWith(activeTheme: activeTheme));
    return activeTheme;
  }
}
Using Cubit for these global states ensures your app remains clean, reactive, and scalable as it grows.
️Step 3: Provide ThemeCubit Globally
In our app.dart, we will provide the entire application with our preferences and cubit status.
... import 'package:flutter_bloc/flutter_bloc.dart'; ... import 'package:flutter_flashcarte_app/features/profile/presentation/cubit/cubit.dart'; class App extends StatelessWidget { const App({super.key}); Widget build(BuildContext context) { SystemChrome.setSystemUIOverlayStyle(... return MultiBlocProvider( providers: [ BlocProvider<PreferencesCubit>( create: (context) => PreferencesCubit()..getActiveTheme(), ), ], child: ScreenUtilInit( designSize: const Size(375, 667), minTextAdapt: true, splitScreenMode: true, builder: (context, __) { return BlocBuilder<PreferencesCubit, PreferencesState>( builder: (context, state) { return MaterialApp.router( routerConfig: appRouter, localizationsDelegates: const [... debugShowCheckedModeBanner: false, builder: (BuildContext context, Widget? child) {... title: 'Flashcard App', theme: themeLight(context), darkTheme: themeDark(context), locale: Locale(state.lang ?? "en"), supportedLocales: I18n.all, themeMode: state.activeTheme.mode, ); }, ); }, ), ); } }
At this point, we can now access our status to set our default language and theme.
Step 4: Change language and theme
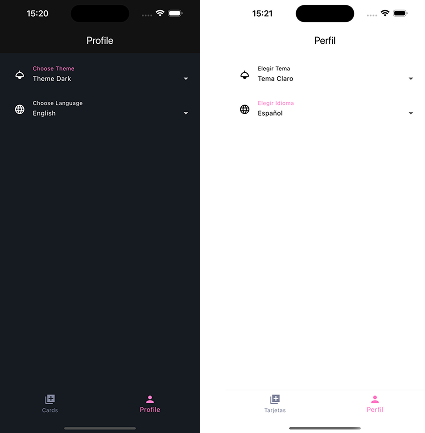
Now we can change the language and theme from our profile page.
// features/profile/presentation/pages/profile_page.dart import 'package:flutter/material.dart'; ... class ProfilePage extends StatelessWidget { const ProfilePage({super.key}); Widget build(BuildContext context) { final ActiveTheme selectedTheme = context.select( (PreferencesCubit c) => c.state.activeTheme, ); late final List<PreferencesState> listLanguage = [ PreferencesState(title: Constants.get.english, lang: "en"), PreferencesState(title: Constants.get.spanish, lang: "es"), ]; PreferencesState selectedLanguage = listLanguage[0]; return Scaffold( appBar: AppBar(title: Text(Strings.of(context)!.profileTitle)), body: SingleChildScrollView( child: Padding( padding: EdgeInsets.all(Dimens.space16), child: Column( children: [ // Theme Dropdown DropdownButtonFormField<ActiveTheme>( key: const Key("dropdown_theme"), value: selectedTheme, decoration: InputDecoration(... items: ActiveTheme.values... onChanged: (ActiveTheme? value) { if (value != null) { context.read<PreferencesCubit>().updateTheme(value); } }, ), SizedBox(height: Dimens.space16), // Language Dropdown DropdownButtonFormField<PreferencesState>( key: const Key("dropdown_language"), value: selectedLanguage, decoration: InputDecoration(... items: listLanguage... onChanged: (PreferencesState? value) { if (value != null) { context.read<PreferencesCubit>().updateLanguage( value.lang ?? "en", ); } }, ), ], ), ), ), ); } }
And this is the result:
|
✅ Why We Chose Cubit
- 💡 Simple syntax: No events to define, just methods and states.
- 🧼 Clean separation: Keeps logic out of widgets.
- 🔁 Testable: Easy to write unit tests.
- 🧩 Composable: Works great with
Bloc, should your app scale further.
🧰 6. Dependency Injection with get_it: Keeping Your App Decoupled and Testable
As your app grows, managing dependencies manually becomes chaotic. You will need to instantiate your repositories, cubits, use cases, and data sources in multiple places, leading to tight coupling and making testing difficult.
This is where Dependency Injection (DI) comes in.
What is Dependency Injection?
Dependency Injection is a design pattern that:
- Decouples class creation from class usage.
- Makes it easy to swap implementations (e.g., mock repositories during testing).
- Improves scalability and maintainability.
In Flutter, a popular DI tool is get_it, a service locator that allows you to register and retrieve dependencies globally in a clean, structured way.
Step 1: Install get_it dependency
flutter pub add get_it
Verify the result in your pubspec.yaml file:
dependencies:
  ...
  # Service locator, use for Dependencies Injection
  get_it: ^8.0.3
Step 2: Setting Up get_it
// core/di/dependecy_injection.dart

import 'package:get_it/get_it.dart';

import 'package:flutter_flashcarte_app/features/profile/presentation/cubit/cubit.dart';

GetIt sl = GetIt.instance;

Future<void> serviceLocator() async {
  // dataSources
  // repositories
  // use cases
  _cubit();
}

void _cubit() {
  /// Profile
  sl.registerFactory(() => PreferencesCubit());
}
Step 3: Initialize DI Before Running Your App
In main.dart:
import 'dart:async';
...

import 'package:flutter_flashcarte_app/core/di/dependecy_injection.dart';
import 'package:flutter_flashcarte_app/app.dart';

void main() {
  runZonedGuarded(
    /// Lock device orientation to portrait
    () async {
      WidgetsFlutterBinding.ensureInitialized();

      /// Register Service locator
      await serviceLocator();

      return SystemChrome.setPreferredOrientations([
        DeviceOrientation.portraitUp,
        DeviceOrientation.portraitDown,
      ]).then((_) => runApp(const App()));
    },

    /// Catch any errors
    (error, stackTrace) => {},
  );
}
🚦 Why Use get_it Instead of Instantiating Directly?
- Single Source of Truth: Register your dependencies once, access them anywhere.
- Testability: Swap implementations with mocks for unit testing.
- Loose Coupling: Classes depend on abstractions (interfaces), not implementations.
🧩 Example: Accessing a Cubit Anywhere
If you need to access a cubit outside the widget tree (e.g., in a background service), you can retrieve it easily:
final ActiveTheme selectedTheme = sl<PreferencesCubit>().getActiveTheme();
You now have a clean, testable architecture ready to scale.
In this first article, you’ve laid the groundwork for building scalable Flutter applications with Clean Architecture. You have:
- Structured your project with a clear, scalable folder organization.
- Implemented internationalization, preparing your app for global audiences.
- Set up theming with light/dark modes and responsive design using flutter_screenutil.
- Configured navigation with
go_routerfor clean, declarative routing. - Mastered Cubit for simple, scalable state management, applying it to theme and language switching.
- Integrated dependency injection with
get_itto decouple and manage your app’s dependencies cleanly.
You now have an app skeleton that is clean, maintainable, and ready to scale.
🎯 What’s Next?
In the next article, we will:
- Dive into the Domain Layer of Clean Architecture.
- Define entities, use cases, and repository contracts.
- Show how to apply SOLID principles to your business logic.
- Connect these concepts to your Flashcard App, preparing it for real data and logic.
If you have questions or want specific concepts covered in more depth, drop a comment or message me so we can refine this series together.
You can find the initial code in this repository in the app-initialization branch. If you think this repository has been useful to you, do not hesitate to leave your star!.
You can find this and other posts on my Medium profile some of my projects on my Github or on my LinkedIn profile.
¡Thank you for reading this article!
If you want to ask me any questions, don't hesitate! My inbox will always be open. Whether you have a question or just want to say hello, I will do my best to answer you!